Basic HTML Version


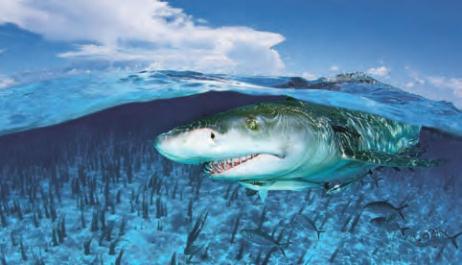


GETTING IN POLE POSITION
TEXT AND PHOTOS BY ALEX MUSTARD
Although attaching a camera to the end of a pole and firing
it remotely is certainly not the simplest way to produce
stunning underwater images, it is an excellent option when
we can’t or shouldn’t be in the water. Perhaps the subject is
too aggressive or too timid, the seabed is too easily stirred
up or there’s too much current. Perhaps access is restricted,
as at a wildlife reserve or a swimming championship. In
these situations, polecams have the potential to do that most
wonderful thing in photography: create an image that would
be impossible to get any other way.
Critical to successful polecamming is good equipment,
which can be either purchased or custom-made. The two
main components are the pole and a remote trigger for firing
the shutter. There is nothing complex about the pole’s design,
although one that breaks into sections is best for travel. You
need an adjustable angle between the pole and camera to
account for different situations and, ideally, a means to mount
the housing either horizontally or vertically. Remember there
is no need for the camera to be the right-side-up, and it is
often easiest to mount the pole to the threaded base of the
housing. This setup also benefits the strobes, which typically
mount onto the top of housings and so remain underwater.
Firing the camera may be either mechanical or electronic.
Mechanical is simplest, and the most basic device is a piece
of string attached to the shutter control, sometimes activated
with a lever from a bicycle brake. Electronic shutter releases
cost a bit more but are very reliable and best if you want to
use the technique frequently. You will want to mount the
release to the pole so it can be triggered with a single finger,
as your hands will be fully occupied with the weight of the
system and the motion of the subject.
A monitor is not strictly essential but can be useful for
viewing your results or for seeing what the camera sees (or
both). Some photographers rig a monitor to a small video
camera that peers through the camera’s viewfinder. Others
attach the monitor to the high-definition multimedia interface
(HDMI) output and run the camera in live-view mode, seeing
both what the camera sees and then, after each photo, the
result. Alternatively, to avoid the shutter lag of live-view, you
can use this system just for reviewing shots, aiming the pole by
sight and then confirming focus and exposure.
Shooting techniques are pretty straightforward, just be
sure to take plenty of frames. Aiming without a monitor
is actually very easy using a wide-angle lens. If the subject
is completely underwater then autofocus copes well. If the
subject is right at the surface I prefer to use a manual (fixed)
focus because bubbles and the surface itself create challenges
for autofocus. An automatic exposure mode is usually best,
as this precludes having to repeatedly lift the housing out of
the water to change settings. I favor aperture priority when
using strobes and shutter priority for available light shots.
Strobes are often not needed so close to the surface.
To enhance comfort, as digital single-lens reflex (DSLR)
cameras are quite heavy in aluminum housings, I add floats
to my housing when polecamming, usually aiming for
positive buoyancy and horizontal trim. Smaller compact
cameras and new mirrorless systems weigh much less, which
really counts when you’re holding a pole for a long time.
The final ingredient in successful polecamming is luck.
The technique requires a subject that is willing to come
close to the camera repeatedly, and as it can rely on spray-
and-pray, we want many attempts. But having the right gear
improves the odds enormously.
AD
www.alertdiver.com
|
103
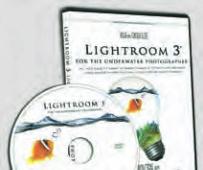
LIGHTROOM 3 FOR THE UNDERWATER
PHOTOGRAPHER
BY DOUG AND LORENZA SLOSS
For photographers who would rather spend more time
taking pictures and less time struggling with tedious
image-processing software, Adobe Lightroom has been
nothing short of a workflow miracle.
Elegantly showcasing Lightroom’s power and the subtle
enhancements it offers, the DVD Lightroom 3 for the
Underwater Photographer by Doug and Lorenza Sloss is a
must-have resource. The Sloss’ insights will help you
better manage your archive, master Lightroom’s many
assets and enhance your efficiency and creative control.
The DVD is organized into 10 hours of video tutorials
grouped by six major themes (Catalog, Library, Develop,
Export, Photoshop/Photomatix Integration and
Slideshow/Print/Web), so you can
learn precisely what you want to
know at your own pace, according to
your own priorities. Lightroom 3
for the Underwater
Photographer is beautifully
produced and illustrated with
brilliant underwater images.
Find out more at
www.AlertDiver.com.
100-103_PhotoTech_Winter2012.indd 103
1/12/12